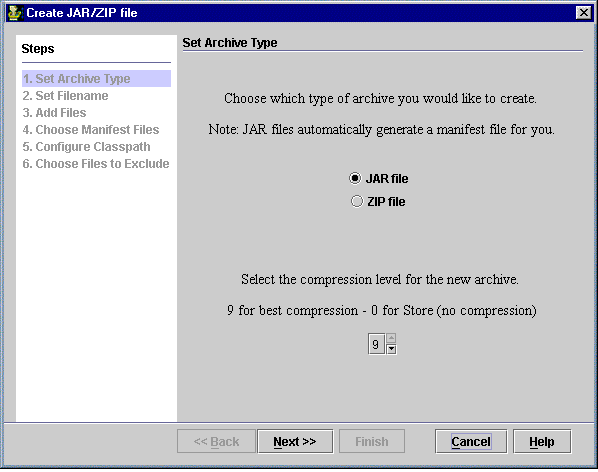
Choose to create a JAR if you want a manifest file (recommended, since creating a ZIP does not add one). You can adjust the compression level to achieve an optimum balance between the JAR size and the speed of compression. The compression level scheme should reflect your intentions for the JAR (0 does not compress at all, and is best suited for storage).
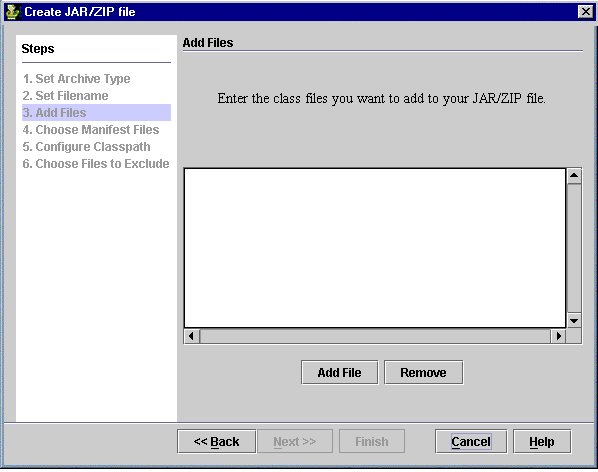
The list indicates which class files you have added thus far (obviously, it is initially blank). You can add individual files, but you can also add entire directory folders.
If a directory contains many class files, when you click Add it will call the Directory Filter:

Here, you can set up search conditions so that only the matching files in the directory are included.
The manifest file contains information about the files packaged in a JAR file. Fine-tuning of the information in a manifest file enables the JAR file to be used for different purposes. For more details, see Sun's Java Developer Connection webpage.
The list indicates which manifest files you have added thus far (again, it is initially blank). If you need to remove any manifest files that you have added, simply select the file and click Remove.
When the JAR is being created, JarMaster looks through these manifest files for any relevant entries. A manifest entry is considered relevant if it is associated with any of the classes you selected, as well as their direct and indirect dependencies. All relevant entries from all included manifest files are consolidated into a new manifest file.
If you have not created a manifest file, the Wizard will not be able to make it for you. Once your JAR has been built, you should create one using JarMaster's Manifest Editor.
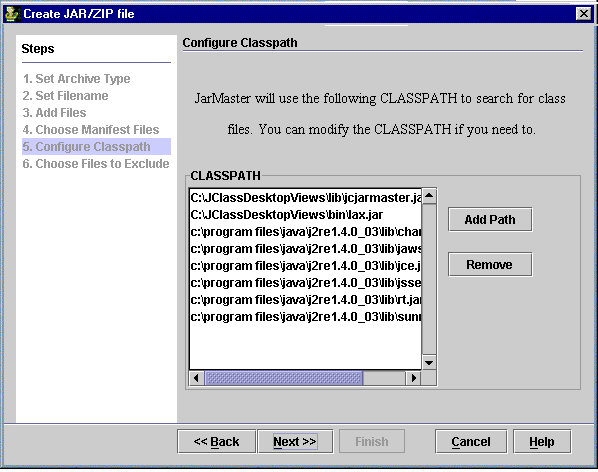
The list of CLASSPATH entries is based on your environment CLASSPATH. These are the paths that JarMaster needs in order to include all necessary class files and to search for class dependencies.
If you modify any CLASSPATH entries here in the Wizard, the changes only take effect for this particular JarMaster session.
If some packages or classes are already present on the system, you can exclude them from the new JAR file to further minimize its size. Two great examples are Sun's Java and Swing packages (excluded by default). Another example could be common or third-party code contained in a separate JAR file installed on the user's system. If not excluded here, JarMaster will include any class that is referenced by any other class.
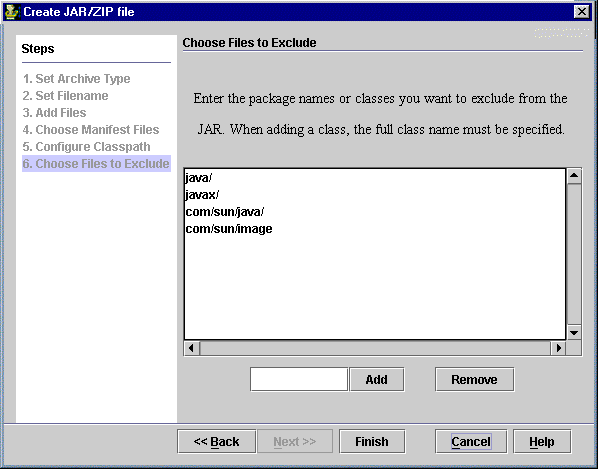
By default, JarMaster excludes any files that are part of Sun's Java and Swing packages. If any of these packages' files are dependent on your selected classes, they will not be included in your JAR.
If you wish, you can include these packages by selecting them and clicking Remove. This removes them from this exclusion list. If you do this, you must have these packages listed in your CLASSPATH.
You can Add any other packages to this exclusion list if you are certain that the users who will receive your distribution will already have them on their system.
The newly created JAR appears in JarMaster's workspace.