|
7
Printing Options
Printing to the System Printer
Printing to a File
Printing to a Screen
Creating a Printer, in Chapter 2, demonstrated that in order to print from a JClass PageLayout application you first need to set up a printer object that defines the nature of the print output. (We suggest that you buffer print output. See the note on Printing Large Documents, in Chapter 1, for details.) This chapter provides a more detailed explanation of the print options JClass PageLayout makes available to you.
7.1 Introduction
The printer associated with a document is used to determine text size in order to perform text layout. Since the printer initially associated with a document is used to size and lay out the text, using a different printer to create the output stream or image may result in spacing problems.
Please note that a document may hang when it is printing. This can happen if the flow contains a floating object that is too large to fit in any frame in the document. The flow will attempt to past all floating objects as part of completing the document before printing it, which includes pasting any floating objects that haven't yet been fit into the document. If the floating object does not fit into the current frame, the flow will traverse to the next frame, possibly generating a new page, and try there. If there is no frame in the document large enough to contain the object, then a simple infinite loop will result.
7.2 Printing to the System Printer
JClass PageLayout provides two different printing formats that send output to your system printer.
JCAWTPrinterallows you to render most AWT components in accordance with the Java 2 Printing API.
7.2.1 Using JCAWTPrinter
Printing to the system printer using
JCAWTPrinteris much slower than using other JClass PageLayout printing methods.JCAWTPrinteruses the Java 2 Printing API, and supports most of the Graphics 2D API. The Java 2 Printing API usually causes all Java 2D graphics to be rendered on the client machine before sending a raster image to the printer. When this raster printing method is used, the amount of data sent to the printer is much greater than the amount of data created by other printers. This aspect of the Java 2 Printing API is the reason why usingJCAWTPrinterto print to the system printer is not as efficient as using the other printing methods supported by JClass PageLayout.There is an optimized shape printing method that can be used in place of the raster printing method above under certain conditions. If there are no images on the page, and if only solid colors are used (
java.awt.Color), then the shape printing method will be used. This optimized process converts the graphics on the page into shapes, which are then filled. Less data is generated using this process instead of the raster printing method, although a large amount of data can still be generated for complex shapes (such as a page of text). The shape printing method case is being extended, so printing performance should be better in the next Java 2 platform release.Java requires that you instantiate
JCPrinter printer = null;JCAWTPrinterin atryblock. To obtain the best results, the page templates list, which will later be passed to theJCDocumentconstructor, should also be passed to theJCAWTPrinterconstructor. It is possible to use the current printer driver and not pop up the print dialog. There is a constructor for aJCAWTPrinterwhich takes a boolean that determines whether to pop up the dialog, as shown in the following code fragment:
try {
// Create an AWT printer, output to printer. Don't show print dialog
printer = new JCAWTPrinter(false, templates);
}
catch (JCAWTPrinter.PrinterJobCancelledException e) {
System.out.println("Print Job Cancelled by user");
System.exit(1);
}After programming the output, send it to the system printer.
document.print();
7.3 Printing to a File
You may already know that
java.io.FileOutputStreamlets you write data to a file.JCHTMLPrinter,JCPCLPrinter,JCPDFPrinter, andJCPostScriptPrinterformat file output to enable your application to print directly to HTML, PCL, PDF, and PostScript files.
7.3.1 Printing to a PostScript File
The following example generates an Adobe PostScript file using the
JCPostScriptPrinter.
- Create an instance of the
FileOutputStreamclass. try {
outfile = new FileOutputStream("test.ps");
}
catch (FileNotFoundException e) {
System.out.println("Could not open file");
return;
}- Next, instantiate the printer object, selecting
outfileas its output stream. printer = new JCPostScriptPrinter(outfile);- To generate the file, call the
JCDocument.print()method.
7.3.2 Printing to a PDF File
The following example generates an Adobe PDF file using the
JCPDFPrinter.
- Create an instance of the
FileOutputStreamclass. try {
outfile = new FileOutputStream("test.pdf");
}
catch (FileNotFoundException e) {
System.out.println("Could not open file");
return;
}- Instantiate the printer object, selecting
outfileas the output stream. printer = new JCPDFPrinter(outfile);- To generate the file, call the
JCDocument.print()method.
7.3.3 Printing to a PCL file
The following example generates a Hewlett-Packard PCL file using the
JCPCLPrinter.
- Create an instance of the
FileOutputStreamclass. try {
outfile = new FileOutputStream("test.pcl");
}
catch (FileNotFoundException e) {
System.out.println("Could not open file");
return;
}- Instantiate the printer object, selecting
outfileas the output stream. printer = new JCPCLPrinter(outfile);- To generate the file, call the
JCDocument.print()method.
7.3.4 Printing to an HTML file
The following example generates an HTML file using the
JCHTMLPrinter.
- Create an instance of the
FileOutputStreamclass. try {
outfile = new FileOutputStream("test.html");
}
catch (FileNotFoundException e) {
System.out.println("Could not open file");
return;
}- Instantiate the printer object, selecting
outfileas the output stream. printer = new JCHTMLPrinter(outfile);- To generate the file, call the
JCDocument.print()method.Because the HTML specification lacks many of the features normally associated with printed documents you will encounter certain limitations if you decide to create HTML pages from JClass PageLayout. Among the limitations are:
- No pagination - HTML has no tag for a page, so the document becomes a single HTML file. Users scroll through the file using their browser. Whatever pagination information the source file contains is ignored.
- Components/images - HTML pages created with JClass PageLayout cannot include components or images.
- Tables - HTML does define a table tag, but the mechanism is very different from that used by most page layout applications. Not all of your table formats are available when exporting to HTML.
- Single header and footer - Because the concept of a page is lost in HTML, different page headers and footers throughout the document are ignored. Instead, JClass PageLayout attempts to find a header and a footer to be used as header and footer for the entire HTML document.
7.4 Printing to a Screen
You can use
JCAWTScreenPrinterto create a JavaJComponenton which it will render your print output. You can then embed the component in your application. For example, in JClass PageLayout, we useJCAWTScreenPrinterto create the print previewer described in the next section.
- First, get the component from the printer: JCPrintPage page = (JCPrintPage)
((JCAWTScreenPrinter)printer).getComponent();The returned component is a subclass of
JComponentcalledJCPrintPage.- Set the document and page you want to render to the component: page.setDocument(document);
page.setPage(0);- Add the frame to the component and make it visible: frame.getContentPane().add(page);
frame.pack();
frame.setVisible(true);
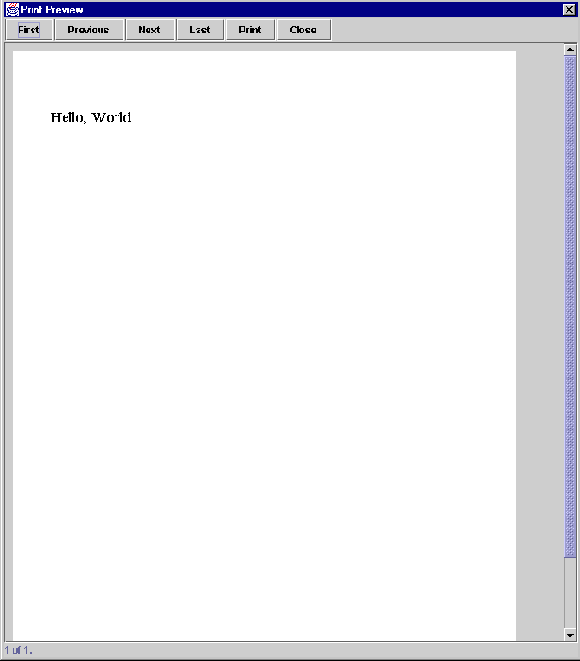
7.5 Print Preview
End users have grown accustomed to the "Print Preview" - an interim step that displays documents as they will appear when printed. Print previews make it possible for the user to page through their documents and scan for layout errors before they send the document to the printer. JClass PageLayout brings this functionality to Java applications using the
JCAWTPreviewerclass.As described in the previous section,
JCAWTPreviewer previewer = new JCAWTPreviewer("Print Preview", frame, document);JCAWTPreviewerrequiresjava.awt.ComponentandJCAWTScreenPrinterto realize the component on which the frame will be drawn. The next step is to use aJCAWTPreviewerconstructor to declare the title that will be displayed in the frame, the name of the frame declared in your program, and the name of the document you want to display in the frame.
previewer.setVisible(true);As well, in order for the
JCAWTPreviewerto work correctly, theFlushPolicymust be set toFLUSH_POLICY_ALWAYS_SAVE. (For details onFlushPolicy, please refer to FlushPolicy.)In print preview mode, the Hello, World program you saw in JClass PageLayout Basics, in Chapter 1, might appear as follows:
Figure 32 : Print preview.
7.6 OutputPolicy and FlushPolicy
Once a page is created, you can designate whether it will be held until the entire document is finished before it is printed. This is set via the
outputPolicyproperty; please see OutputPolicy.As well, once pages are printed, you can designate whether pages are to be discarded once printed. You can do this by setting the
flushPolicyproperty. Please see FlushPolicy.OutputPolicy
Once a page is created, you can designate whether it will be held until the entire document is finished before it is printed. In the
JCDocumentclass, theoutputPolicyproperty indicates whether rendered pages are to be held for printing. If set toOUTPUT_POLICY_ON_REQUEST(default), then completed pages are held in memory until the document is printed. If set toOUTPUT_POLICY_IMMEDIATE, then each page is outputted as it is completed (if all predecessors are complete).The
getOutputPolicy()method gets the document's current policy on outputting completed (rendered) pages. ThesetOutputPolicy()method sets the document's behavior for outputting printed pages. Its parameter,outputPolicy, indicates the policy to apply to completed (rendered) pages.FlushPolicy
Once pages are printed, you can designate whether to save or flush them. In the
JCDocumentclass, theflushPolicyproperty indicates whether pages are to be discarded once printed. If set toFLUSH_POLICY_ALWAYS_SAVE(default), then all pages are saved, not flushed, as they are completed and printed. If set toFLUSH_POLICY_ON_OUTPUT, then pages are flushed as they are completed and printed.The
getFlushPolicy()method gets the document's current policy on flushing completed (printed) pages. ThesetFlushPolicy()method sets the document's behavior for flushing printed pages. TheflushPolicyparameter ofsetFlushPolicy()designates the policy to apply to completed (output) pages.In order for the
JCAWTPreviewerto work correctly, theFlushPolicymust be set toFLUSH_POLICY_ALWAYS_SAVE.
|
|